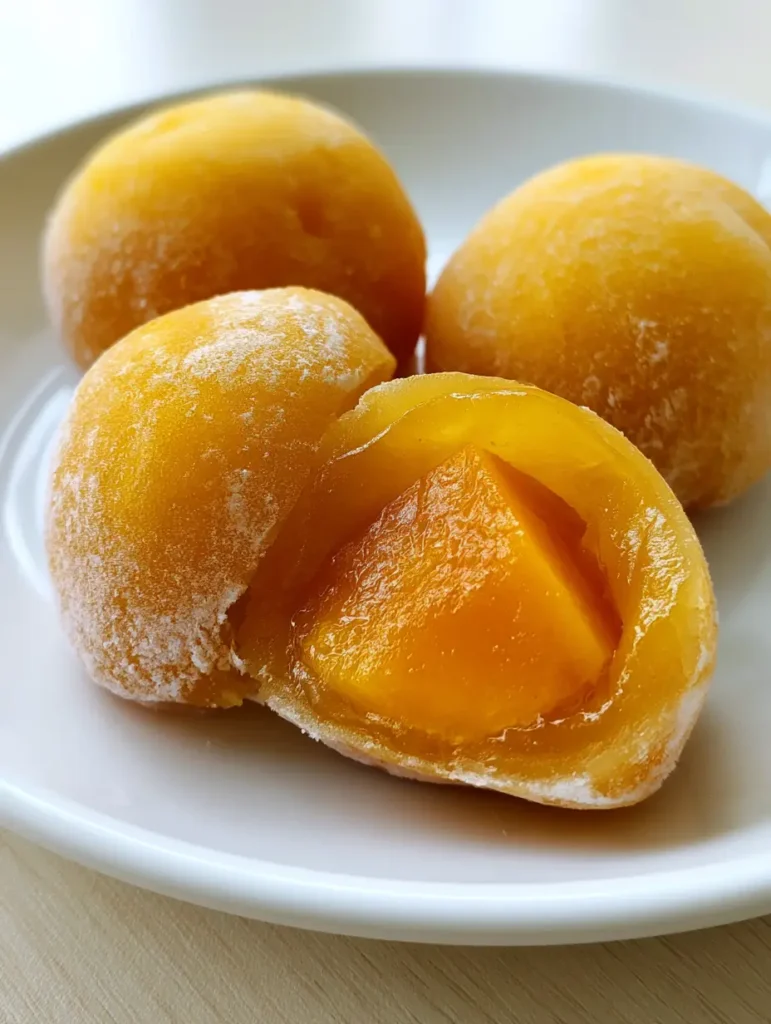
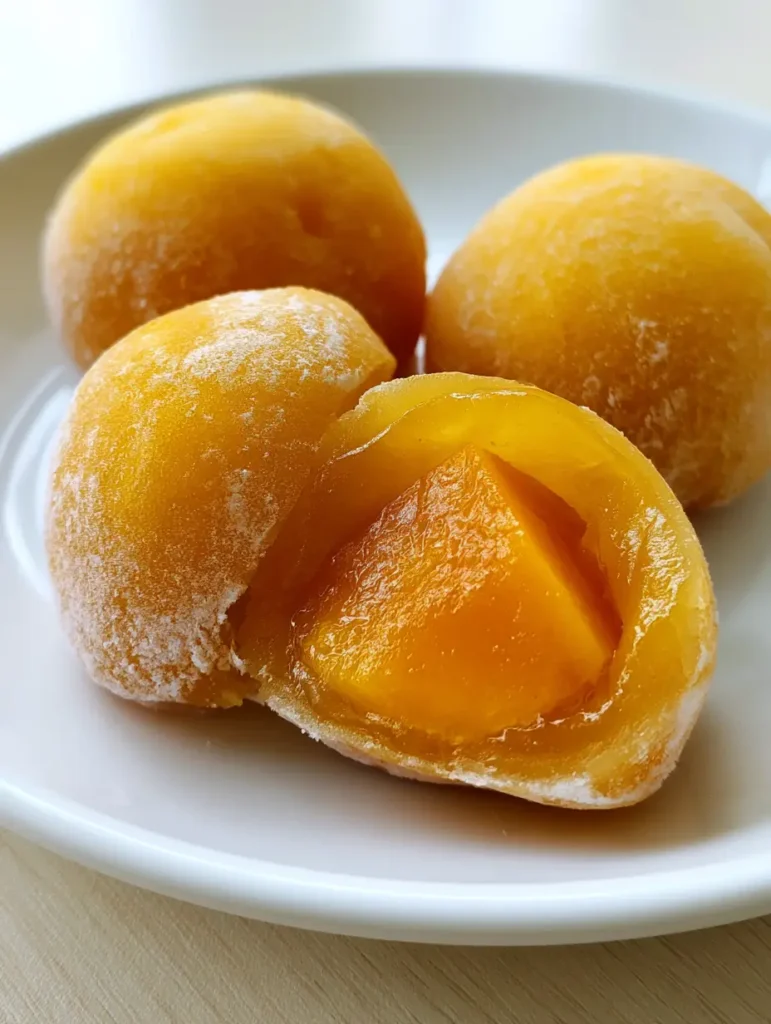
Mango Mochi is the ultimate tropical treat, combining a soft, chewy, translucent golden-yellow skin with a massive, juicy center of sun-ripened mango. If you have ever scrolled through your feed and seen those vibrant, pillowy Japanese-style dumplings and wondered if you could make them at home, the answer is a resounding yes! This recipe focuses on that perfect Mango Mochi texture: elastic, sweet, and bursting with fresh fruit flavor.
Making Mango Mochi at home is surprisingly simple, requiring only a few pantry staples and the best seasonal mangoes you can find. Whether you are a fan of Mango Sticky Rice Rolls or you just love chewy desserts, this vibrant yellow treat is about to become your new obsession. The contrast between the matte, cornstarch-dusted exterior and the bright, succulent mango core is a sensory experience unlike any other.
Why You Will Love This Vibrant Mango Mochi
- The Perfect Texture: A thin, elastic glutinous rice dough shell that provides that signature “QQ” chewiness.
- Naturally Vibrant: We use a hint of natural coloring to achieve that stunning, translucent golden-yellow hue seen in professional boutiques.
- Fresh Fruit Forward: Unlike store-bought versions with jelly fillers, this uses fresh ripe mango cubes for maximum juice.
- Pinterest-Ready Aesthetics: These look like professional-grade confections but are made on your stovetop in minutes.
If you are planning a themed dinner night, these pair beautifully as a light dessert after Honey Lime Chicken with Mango Salsa or even a spread of cheap Saturday night dinner ideas.
Essential Ingredients for Golden Mango Mochi
To achieve the forensic visual accuracy of a high-end mochi, each ingredient serves a specific culinary purpose. Do not skip the cornstarch dusting, as it is the secret to handling the sticky dough.
- 1 ½ cups (180g) Glutinous Rice Flour: This is the foundation. It must be glutinous (sweet) rice flour to get that elastic, sticky texture.
- ¼ cup (30g) Cornstarch: This acts as a stabilizer in the dough and a crucial coating for your hands and work surface.
- ½ cup (100g) Granulated Sugar: Provides the perfect level of sweetness to balance the tartness of the mango.
- 1 cup (240ml) Water or Mango Juice: Using mango juice helps achieve that vibrant, translucent golden-yellow color naturally.
- 1 tbsp (15ml) Neutral Oil: A tiny bit of oil ensures the dough stays supple and doesn’t dry out too quickly.
- 2 Large Ripe Mangoes: Look for Ataulfo or Honey mangoes for a bright orange ripe mango center that is fiber-free.
- Extra Cornstarch for Dusting: Essential for the soft, matte, slightly dusty texture.
Step-by-Step: How to Make Steamed Yellow Glutinous Rice Dough
The key to perfect Mango Mochi is the steaming process. This ensures the flour is fully hydrated and cooked through, resulting in a skin that is both strong and meltingly soft.
Step 1: Preparing the Mango Centers
Peel your mangoes and cut them into large, juicy cubes, roughly 1-inch (2.5cm) square. Place them on a paper towel to blot excess moisture. If the mango is too wet, the dough will struggle to seal. For more fruit-forward inspiration, you might enjoy our Peach and Brie Grilled Cheese which also celebrates stone fruit sweetness.
Step 2: Mixing the Vibrant Yellow Batter
In a heat-proof glass bowl, whisk together the glutinous rice flour, sugar, and cornstarch. Slowly pour in the water (or mango juice) and oil. Stir until the batter is completely smooth with no lumps. If you want a more vibrant golden-yellow color, you can add a tiny drop of natural yellow food coloring at this stage.
Step 3: The Steaming Process
Cover the bowl with plastic wrap (pierce a few holes) and place it in a steamer over boiling water. Steam for 15-20 minutes. Visual Cue: The dough is done when it changes from an opaque liquid to a translucent, matte yellow solid that is very sticky to the touch.
Step 4: Kneading and Cooling
While hot, use a wet spatula to fold the dough over itself several times. This develops the elasticity. Allow the dough to cool until it is safe to handle but still warm. Warm dough is much easier to stretch than cold dough.
Assembling Your Fresh Mango Mochi
This is where the magic happens! To get that handheld smartphone photo look, follow these assembly tips carefully.
Step 5: Scaling and Dusting
Generously dust your clean wooden surface with cornstarch. Divide the warm dough into 8-10 equal pieces. Dust your hands thoroughly; this dough is incredibly “grabby.”
Step 6: The “Wrap and Seal” Technique
Flatten one piece of dough into a 3-inch (7.5cm) circle. Place a bright orange ripe mango cube in the center. Gently pull the edges of the thin, elastic glutinous rice dough shell up and over the mango, pinching it tightly at the top to seal. Roll it between your palms to create a round mango mochi piece.
Step 7: The Final Flourish
Give the finished mochi a light dusting of cornstarch. Use a soft pastry brush to remove any excess, leaving only a soft, matte, slightly dusty texture. This prevents them from sticking to the plate or your fingers.
Expert Tips for Mochi Success
- Keep it Covered: Mochi dough dries out instantly. Keep your unused dough pieces under plastic wrap while you work on one piece at a time.
- Quality of Mango: If your mango isn’t sweet, the mochi will taste bland. Ensure you are using ripe, juicy cubes.
- The Cornstarch Secret: If the dough sticks to your hands, you haven’t used enough cornstarch. Think of it like flouring a bread board.
- Storage: Mango Mochi is best eaten the day it is made. The rice flour will start to harden in the refrigerator.
Frequently Asked Questions
Yes, you can microwave the mixture in 45-second intervals, stirring in between, until it becomes translucent and thick, though steaming provides a more consistent texture.
It is best consumed within 24 hours. Because it contains fresh fruit and the rice flour hardens over time, it does not store well in the fridge.
Yes! Despite the name, glutinous rice flour is gluten-free. It is named for its ‘glue-like’ consistency when cooked.
Ataulfo (Honey) mangoes are best because they are sweet, vibrant orange, and lack the fibrous strings found in other varieties.
Mochi is naturally sticky! Use plenty of cornstarch on your hands and work surface, and ensure your mango cubes are blotted dry before wrapping.
How to Store and Serve
Serve these round mango mochi pieces on a plain white ceramic plate to let the vibrant golden-yellow color pop. They are perfect for a summer tea party or as a refreshing finish to a heavy meal.
If you have leftovers, wrap each mochi individually in plastic wrap. They can stay at room temperature for about 24 hours. If refrigerated, the skin will become firm. You can slightly soften them by letting them sit at room temperature for 30 minutes before eating, but the texture is never quite as “QQ” as day one.
What to Serve with Mango Mochi
Since this is a light, fruity dessert, it pairs wonderfully with a cup of green tea or an iced matcha latte. If you are looking for more decadent treats to fill a dessert board, consider adding Coffee Sugar Cookies or Salted Caramel Pretzel Cheesecake Bites for a variety of textures.
The Ultimate Mango Mochi Recipe

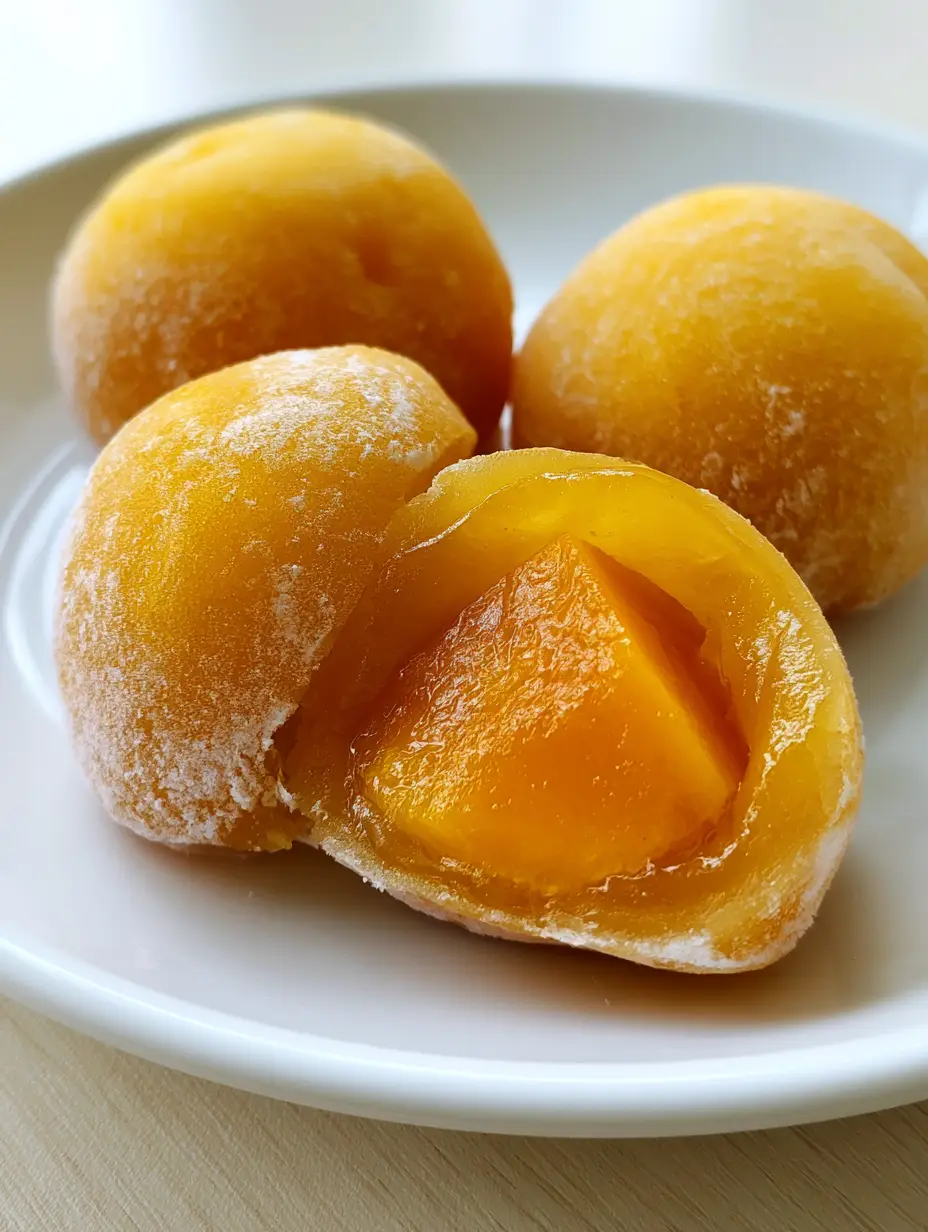
Mango Mochi: Easy Homemade Recipe with Fresh Fruit
Ingredients
Equipment
Method
- Peel and cube the mango into large pieces. Blot with paper towels to ensure they are dry.
- Whisk glutinous rice flour, cornstarch, sugar, water/juice, and oil in a heat-proof bowl until smooth.
- Cover the bowl and steam for 15-20 minutes until the dough is translucent and golden-yellow.
- Fold the hot dough with a spatula to develop elasticity, then let cool until handleable.
- Dust surface with cornstarch. Divide dough into 8 pieces, flatten into circles, and place a mango cube in the center.
- Pinch the dough over the mango to seal and roll into a smooth ball. Dust with extra cornstarch.
Notes
Work with the dough while it's still warm for better stretch.
Share the Mochi Love!
Did you make these Mango Mochi? We want to see your results! Please save this recipe to your Pinterest dessert board so you never lose it. Follow Bite_Journey for more authentic, Pinterest-viral recipes every week. Don’t forget to share a photo of your mochi in the comments and leave us a 5-star rating if you loved that juicy mango center!