When you are away from home, the last thing you want to do is spend hours over a hot stove or scouring the local grocery store for obscure ingredients. These Easy Vacation Meals are designed to maximize your relaxation time without sacrificing a single ounce of flavor. Enter the baked ham and cheese slider: a handheld masterpiece that balances the sweetness of Hawaiian rolls with the salty depth of deli ham and the creamy, sharp bite of Swiss cheese.
Whether you are feeding a hungry group of kids after a day at the beach or looking for a stress-free dinner at the mountain cabin, these sliders hit the mark. They are portable, easy to scale up for crowds, and require very little cleanup. The magic happens in the oven, where the butter glaze transforms a simple sandwich into a golden-brown, toasted delight with cheese that oozes out of the sides, creating those irresistible crispy edges every foodie craves.
In this guide, we will break down the culinary science behind achieving the perfect “ooze,” the secret to a glaze that doesn’t make the bread soggy, and how to present these on a beautiful white ceramic platter for that professional touch. Let’s dive into why these sliders are the quintessential choice for your next getaway.

Why These Baked Sliders Are the Ultimate Crowd-Pleaser
- Textural Contrast: You get a satisfying crunch from the toasted bun tops, a soft and pillowy interior, and a silky, melted cheese center.
- Salty-Sweet Balance: The natural sugar in the Hawaiian rolls perfectly complements the savory, pink deli ham and the tangy Dijon-infused butter glaze.
- Visually Stunning: Arranged on a white ceramic platter, the contrast between the golden-brown crust, black poppy seeds, and white Swiss cheese is striking.
- One-Pan Simplicity: These Easy Vacation Meals minimize dishes by allowing you to assemble and bake everything in a single rectangular pan.
The Flavor Foundation: Everything You Need for Hawaiian Roll Sliders
To achieve the visual and flavor profile of a professional kitchen, every ingredient must serve a purpose. We aren’t just making sandwiches; we are building a flavor profile that relies on high-quality basics and specific textures.
Hawaiian Sweet Rolls (12-pack): These are the backbone of the dish. Their high sugar content allows for rapid caramelization, resulting in those beautiful golden-brown tops seen in our visual blueprint.
Thinly Sliced Deli Ham (1 lb / 450g): For the best texture, use honey ham or black forest ham. Folding the thin slices creates air pockets that hold heat and keep the sliders juicy.
Swiss Cheese Slices (8-10 slices / 225g): Swiss is essential for its “melt-ability” and mild, nutty profile. It creates that iconic white, bubbly “ooze” that spills over the edges during the baking process.
Unsalted Butter (1/2 cup / 115g): This acts as the fat medium for the glaze. Using unsalted butter allows you to control the sodium levels, ensuring the ham doesn’t make the dish overly salty.
Dried Minced Onion (1 tbsp / 10g): Unlike fresh onion, the dried version provides a concentrated, savory crunch that rehydrates slightly in the butter, offering a deeper umami flavor.
Black Poppy Seeds (1 tbsp / 9g): These are primarily for visual appeal and a slight nutty texture. They provide the classic “deli style” look that contrasts beautifully against the golden rolls.
Dijon Mustard (1 tbsp / 15g): An “invisible” but vital ingredient. The acidity in the mustard cuts through the richness of the butter and cheese, balancing the entire bite.
Worcestershire Sauce (1 tsp / 5ml): This adds a fermented, savory depth that enhances the meatiness of the ham and helps the glaze achieve a deeper brown hue.
Kitchen Tools for Success on the Road
One of the reasons these are such Easy Vacation Meals is the minimal equipment required. You can find these tools in almost any Airbnb or vacation rental kitchen.
You will need a sharp serrated knife to slice the entire block of rolls at once. A small microwave-safe bowl is necessary for melting your butter glaze, and a pastry brush is ideal for even distribution, though a spoon works in a pinch. Finally, a 9×13 inch (23×33 cm) baking pan and a white ceramic platter for serving will complete the professional presentation.
The Culinary Process: Crafting the Perfect Slider
Preparing the Base and Meat Layers
Start by preheating your oven to 350°F (175°C). This moderate temperature is the “sweet spot” for melting the cheese thoroughly without burning the tops of the rolls before the center is hot.
Without pulling the individual rolls apart, use your serrated knife to slice the entire slab of Hawaiian rolls in half horizontally. Place the bottom half into your lightly greased baking dish. Now, take your deli ham and instead of laying it flat, create “folds” or ribbons of ham. This technique ensures that every bite has volume and prevents the sandwich from feeling compressed or flat.
The Art of the Cheese Ooze
Layer the Swiss cheese over the ham. For the best visual results, allow the edges of the cheese to hang slightly over the sides of the rolls. As the heat hits the fat in the Swiss cheese, it will begin to melt and “ooze” down the sides. When the cheese touches the hot baking pan, it will form those slightly browned, crispy edges that are packed with concentrated flavor.

Applying the Signature Butter Glaze
In your small bowl, whisk together the melted butter, dried minced onion, poppy seeds, Dijon mustard, and Worcestershire sauce. Use your pastry brush to coat the tops of the rolls generously. Ensure the glaze gets into the nooks and crannies between the rolls. This fat will conduct heat, leading to the “toasted bun tops” and “golden-brown” finish described in our visual guide.
The Final Bake and Sensory Cues
Cover the pan with foil for the first 10-12 minutes to ensure the cheese melts. Then, remove the foil and bake for another 8-10 minutes. Look for specific sensory cues: the smell of toasted onion and butter should fill the room, and the tops of the rolls should be a deep golden-brown. The cheese should be bubbly and visibly white against the pink ham.
Pro Tips for Professional Results
- Avoid Sogginess: If you are worried about the bottom of the rolls getting soft, toast the bottom half of the buns in the oven for 3 minutes before adding the ham and cheese.
- The Foil Trick: Always start with foil. Hawaiian rolls have high sugar content and will burn quickly if left uncovered for the entire bake.
- Let Them Rest: Allow the sliders to sit for 5 minutes after removing them from the oven. This helps the cheese “set” slightly so they are easier to cut and serve.
- Glaze Consistency: Ensure your dried onions are well-distributed in the butter so every slider gets that savory crunch.
Make it a Meal: Serving Suggestions
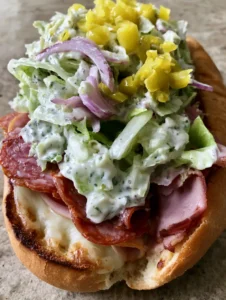
To turn these sliders into a full vacation feast, you need the right side dishes. Since you’re already in relaxation mode, pair these with a tangy batch of refrigerator pickles to cut through the richness of the cheese. A light and crunchy broccoli salad with bacon provides a refreshing temperature contrast to the hot sliders.
If you’re hosting a larger gathering, you can even serve these alongside a Sweet Hawaiian Crockpot Chicken for a full tropical-themed buffet. For dessert, keep the oven off and try an orange creamsicle jello pie or a quick strawberry cheesecake dump cake.
Storing and Reheating Your Sliders
If you happen to have leftovers (though it’s rare!), wrap them tightly in aluminum foil and store them in the refrigerator for up to 2 days. To reheat, keep them in the foil and pop them back into a 350°F (175°C) oven for 10 minutes. This prevents the bread from becoming rubbery, which often happens in the microwave.
These Easy Vacation Meals are also great for prep. You can assemble the sandwiches (without the glaze) a few hours in advance, then simply whisk the glaze together and brush it on right before you are ready to bake.
Frequently Asked Questions
Yes! You can assemble the sandwiches up to 24 hours in advance. Keep them covered in the fridge and only add the butter glaze right before you pop them into the oven to maintain the best texture.
Absolutely. While Swiss provides the classic look and melt, Provolone, Havarti, or even Sharp Cheddar work beautifully in this recipe.
Not at all. Poppy seeds are traditional for the visual aesthetic and a tiny bit of crunch, but you can omit them or replace them with sesame seeds or extra dried onion if preferred.
Since Hawaiian rolls have a high sugar content, they brown quickly. Always cover the pan with aluminum foil for the first half of the baking time to protect the tops while the cheese melts.
The best method is the oven or an air fryer. Wrap the sliders in foil and heat at 350°F (175°C) for about 10 minutes. This restores the crunch to the bun and the melt to the cheese.
The Master Recipe for Baked Ham and Cheese Sliders
Easy Vacation Meals: The Ultimate Melt-In-Your-Mouth Ham and Cheese Sliders
Ingredients
Equipment
Method
- Preheat your oven to 350°F (175°C). Use a serrated knife to slice the entire block of Hawaiian rolls in half horizontally, keeping the individual rolls connected.
- Place the bottom half of the rolls in a baking dish. Layer the deli ham in folds to create volume, then top with slices of Swiss cheese, letting them overlap slightly.
- In a small bowl, whisk together the melted butter, dried onion, poppy seeds, Dijon mustard, and Worcestershire sauce.
- Place the top half of the rolls onto the cheese. Brush the butter mixture evenly over the tops, letting it drip into the spaces between the rolls.
- Cover with foil and bake for 10-12 minutes. Remove foil and bake for an additional 8-10 minutes until the tops are golden-brown and the cheese is bubbly and oozing.
Notes
Substitute Swiss with Provolone or Havarti if you prefer a different flavor profile.

Join the Bite Journey Community!
We hope these ham and cheese sliders make your next trip a little more delicious and a lot less stressful. These Easy Vacation Meals are all about spending less time in the kitchen and more time making memories. If you loved this recipe, please leave a comment below and tell us where you enjoyed them!
Don’t forget to share your culinary creations with us! Pin this recipe to your “Vacation Food” board on Pinterest and follow us for more easy, crowd-pleasing recipes. Happy traveling and even happier eating!