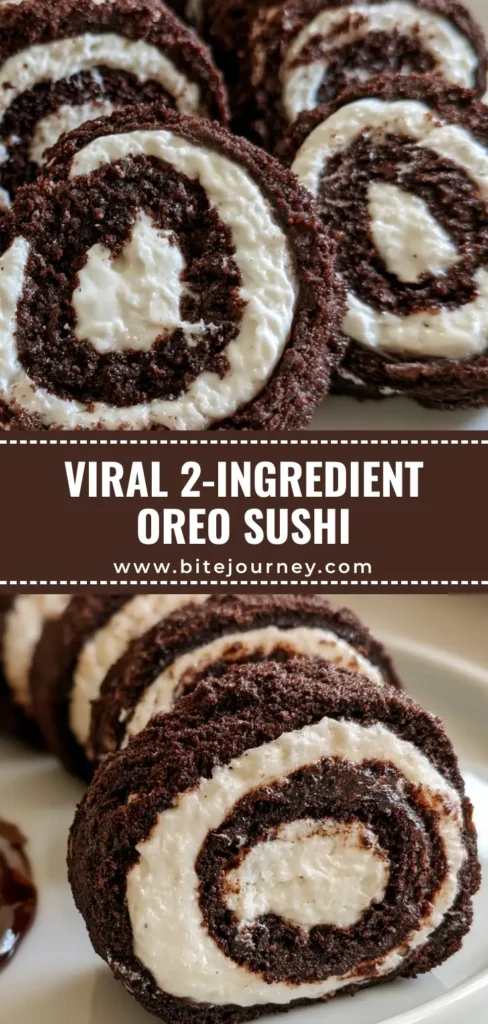
If you have been scrolling through social media lately, you have likely seen the mesmerizing Oreo Sushi Rolls taking the culinary world by storm. This viral sensation is not just a gimmick; it is a masterclass in texture and flavor contrast that turns a classic pantry staple into a gourmet-looking treat. By separating the iconic chocolate wafers from their creamy centers, we create a flexible, dark chocolate “rice” base and a silky white filling that mimics the look of traditional maki sushi.
The beauty of Oreo Sushi Rolls lies in their simplicity and visual impact. These bite-sized delights are perfect for those who crave a sophisticated dessert without the need for an oven. Whether you are hosting a dinner party or just want a fun weekend project with the kids, these rolls deliver a high-end aesthetic with the nostalgic flavor of everyone’s favorite sandwich cookie. Let’s dive into how to achieve that perfect, tight spiral and glossy chocolate finish.
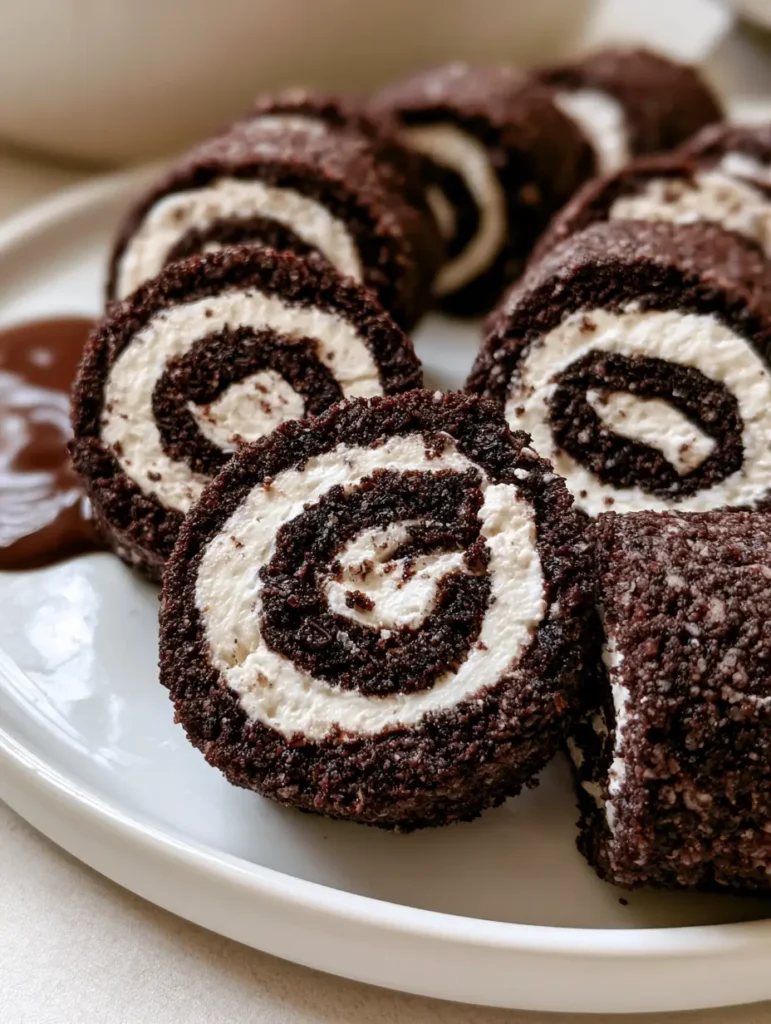
Why These Viral Oreo Sushi Rolls Are a Must-Make
- Unbelievable Texture: A soft, slightly chewy chocolate cookie dough meets a bright white, velvety cream filling for a melt-in-your-mouth experience.
- Stunning Visuals: The high-contrast dark and white spiral looks like it came from a professional patisserie.
- No-Bake Ease: Skip the oven entirely; this recipe uses simple mechanical techniques to achieve Oreo Sushi Rolls perfection.
- Customizable Dipping: The addition of a liquid chocolate dipping sauce adds a layer of richness that balances the sweetness of the cream.
The Science of the Perfect No-Bake Cookie Dough
Creating Oreo Sushi Rolls requires a specific understanding of cookie crumb hydration. To get that “maki” look, the chocolate wafers must be pulverized into a fine dust. When mixed with a small amount of liquid—usually milk or cream—the sugar and cocoa in the crumbs form a pliable, clay-like dough.
This dough is the foundation of your sushi. If it is too dry, it will crack when you attempt the roll. If it is too wet, it will stick to your parchment paper and lose its shape. Achieving the “Goldilocks” zone of hydration is key to getting those uniform maki-style pieces revealed in the final slice. Much like preparing the base for Baked Feta Rolls, the consistency of your outer layer determines the success of the entire dish.
Essential Ingredients for Your Dessert Sushi
To make the best Oreo Sushi Rolls, you only need a handful of ingredients, but quality matters. Here is what you will need to gather:
- 1 Standard Package (14.3 oz / 405g) Oreo Cookies: These provide both the structural chocolate base and the primary flavor for the filling.
- 3-4 tbsp (45-60ml) Whole Milk: This acts as the binder for your crushed cookie crumbs, turning them into a thin, dark chocolate cookie dough.
- 2 tbsp (30g) Softened Cream Cheese (Optional): While you can use just the Oreo cream, adding a bit of cream cheese creates a smooth white cream filling that is more stable and easier to spread.
- 1/2 cup (120ml) Heavy Cream: For the ganache dipping sauce.
- 1/2 cup (90g) Semi-Sweet Chocolate Chips: To be melted into a liquid chocolate ganache for the side.
If you enjoy creative twists on handheld snacks, you might also find the flavor profiles of Mini Grilled Cheese Hawaiian Rolls interesting for your next party spread, though those are decidedly more savory!
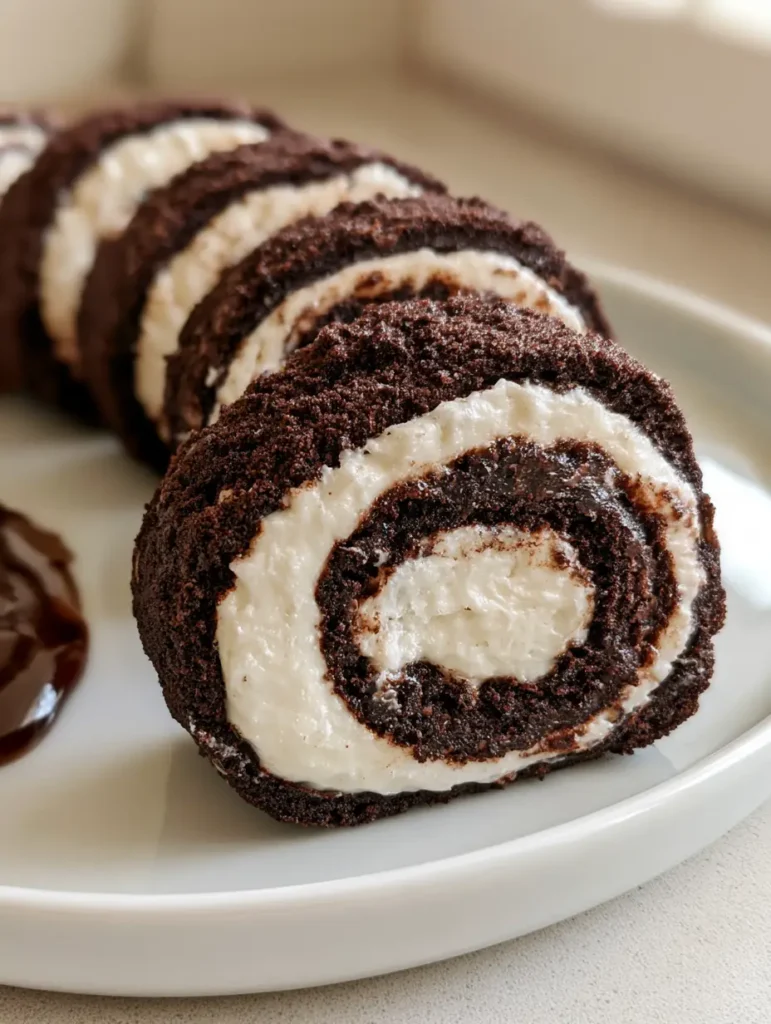
Step-by-Step Instructions for Oreo Sushi Rolls
Step 1: The Separation Process
Begin by carefully separating the chocolate wafers from the white cream filling of all your cookies. Place the wafers in one bowl and the cream in another. This is the most time-consuming part of making Oreo Sushi Rolls, but it is essential for achieving that perfect spiral of dark brown and white. Take your time to ensure no large chunks of wafer remain in the cream.
Step 2: Pulverize the Chocolate Wafers
Place the chocolate wafers into a food processor. Pulse until they are a finely crushed chocolate sandwich cookie powder. There should be no visible large crumbs. If you do not have a food processor, place them in a heavy-duty freezer bag and use a rolling pin to crush them until they resemble fine sand.
Step 3: Hydrate the “Sushi Rice”
Transfer the cookie dust to a mixing bowl. Add the milk 1 tablespoon (15ml) at a time. Mix with a spatula until a tight cylinder of dough can be formed. The dough should feel like soft playdough—pliable but not sticky. If it is too crumbly, add a tiny bit more milk until it holds together. This creates the “base foundation” mentioned in the visual blueprint.
Step 4: Smooth the Cream Filling
Take your bowl of Oreo cream. If it feels too stiff, microwave it for 5-10 seconds just to soften. Whisk it until it becomes a thick, smooth, bright white cream layer. For a more stable roll, whisk in the softened cream cheese at this stage. This ensures the filling doesn’t squish out when you slice your Oreo Sushi Rolls.
Step 5: The Rolling Technique
Place a large sheet of parchment paper on your counter. Place the chocolate dough in the center and top with another sheet of parchment. Roll the dough out into a large, thin rectangle (about 1/8 inch or 3mm thick). Trim the edges to make a clean rectangle.
Spread the white cream filling evenly across the chocolate dough, leaving a small 1/2 inch (1cm) border at the top. This is just like preparing the filling for Roasted Jalapeno Cowboy Cream Cheese dips, where even distribution is paramount for flavor balance.
Step 6: Form the Tight Cylinder
Using the bottom piece of parchment paper to assist you, carefully lift the edge of the dough and begin rolling it into a tight cylinder. Move slowly and use the paper to tuck the roll as you go. Once rolled, wrap the entire log in plastic wrap and refrigerate for at least 30 minutes. Chilling is the secret to uniform maki-style pieces.
Step 7: Prepare the Chocolate Ganache
While the rolls chill, heat your heavy cream until it just begins to simmer. Pour it over the chocolate chips and let sit for 2 minutes. Stir until you have a small portion of liquid chocolate ganache. This liquid chocolate dipping sauce is the perfect companion for your finished Oreo Sushi Rolls.
Expert Tips for Success
- Use a Hot Knife: To get the cleanest cuts and reveal that perfect spiral, dip your knife in hot water and wipe it dry between every single slice.
- Parchment is Mandatory: Do not try to roll the dough directly on the counter; it will stick. Parchment or wax paper is your best friend here.
- Sift Your Crumbs: If you want an ultra-pro finish, run your crushed cookies through a fine-mesh sieve to ensure the “dough” is perfectly smooth.
- Temperature Control: If the dough gets too warm while rolling, pop it in the freezer for 5 minutes. Cold dough handles much better.
How to Store and Serve Oreo Sushi Rolls
These Oreo Sushi Rolls are best served slightly chilled. The contrast between the cold cream and the rich chocolate dough is heightened when they aren’t at room temperature. For a full “sushi” experience, serve them on a minimalist white ceramic plate with chopsticks and the ganache in a small soy sauce dish.
If you have leftovers (which is rare!), store them in an airtight container in the refrigerator for up to 5 days. You can also freeze the individual slices on a baking sheet and then transfer them to a bag for a frozen treat that tastes like a high-end Oreo truffle. While these are sweet, if you’re looking for a savory handheld contrast for a party, consider these BBQ Chicken Nachos as a salty companion.
What to Serve With This
Since Oreo Sushi Rolls are quite rich, they pair beautifully with fresh, acidic elements. Consider serving them alongside a platter of fresh strawberries or raspberries. If you are doing a full “fusion” themed night, start with a light meal like a Vietnamese Noodle Salad before bringing out the chocolate “sushi” for dessert.
Frequently Asked Questions
Absolutely! Golden Oreos, Peanut Butter Oreos, or Mint Oreos all work perfectly. Just follow the same separation and crushing process for the different flavors.
The secret is chilling the roll for at least 30 minutes and using a very sharp knife dipped in hot water. Wipe the knife clean after every single cut to prevent the cream from smearing.
Stored in an airtight container in the refrigerator, they will stay fresh and delicious for up to 5 days. They can also be frozen for up to a month.
It is not strictly necessary, but it is highly recommended. It adds stability and a slight tang that balances the sugar, making the ‘sushi’ easier to handle and less cloyingly sweet.
Your dough is likely too dry. Add milk one teaspoon at a time until the mixture is pliable like playdough. Also, ensure you are rolling it between parchment paper to maintain moisture.
The Ultimate Oreo Sushi Rolls Recipe
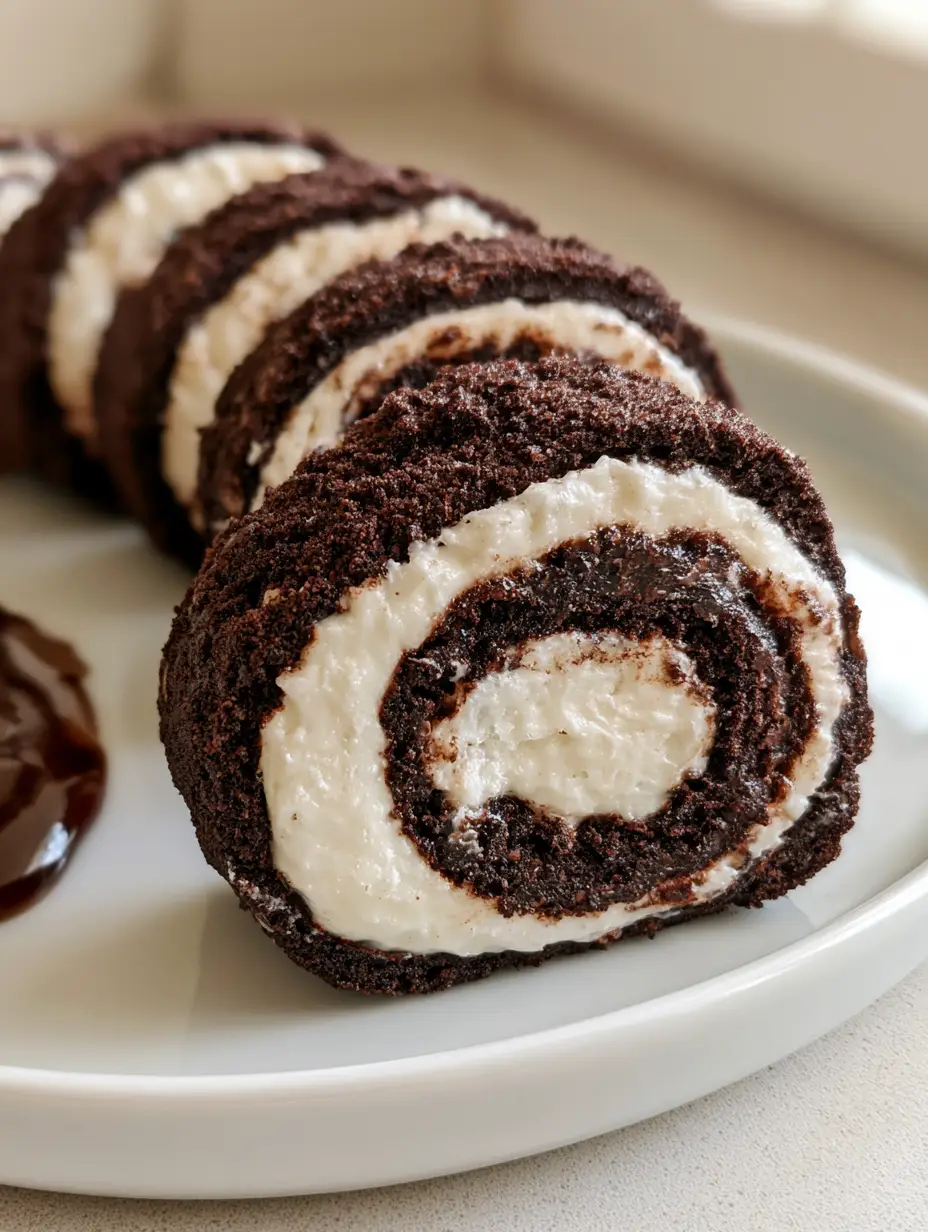
Oreo Sushi Rolls: The Ultimate No-Bake Dessert Trend
Ingredients
Equipment
Method
- Separate the Oreo wafers from the cream filling into two different bowls.
- Process chocolate wafers in a food processor until they become fine crumbs.
- Mix milk into the crumbs until a pliable dough forms. Roll out between parchment paper into a rectangle.
- Whisk the Oreo cream (and cream cheese) until smooth; spread over the dough rectangle.
- Roll into a tight cylinder using the parchment. Chill for 30 minutes before slicing into maki-style pieces.
Notes
Chill thoroughly to ensure the spiral remains intact.
Save This Recipe to Pinterest!
Did you love these Oreo Sushi Rolls? If you made them, we want to see! Take a photo of your perfect chocolate spirals and share it in the comments below. Be sure to save this recipe to your Dessert or No-Bake Pinterest boards so you can find it whenever the chocolate craving hits. Follow Bite_Journey for more viral kitchen hacks and elite recipes. Don’t forget to leave a 5-star rating if you enjoyed this treat!